AWS EventBridge is an architecture changing tool, and it will transform the way you think about serverless development. It helps you build event-driven applications at scale across AWS, existing systems or SaaS apps. It shifts you’re thinking on how distributed systems work from a pipeline towards an event-based model. If you haven’t read up on what Amazon EventBridge is or what it does, we’ve written a whole post about it here detailing the service.
Table of Contents
At the end of this post section
Once you’ve finished this post, you’ll have created an Amazon EventBridge setup that triggers a Lambda based on a specific event. In our case, we send a Purchase event to the event bus, which will start the Inventory Lambda.

Walkthrough
Our implementation will require that we build a new Lambda function that gets routed requests from the Event Bus of EventBridge and operates as a consumer. Let’s start with that.
AWS Lambda
Open up the AWS Lambda service in your AWS account. You can also do so by clicking here.
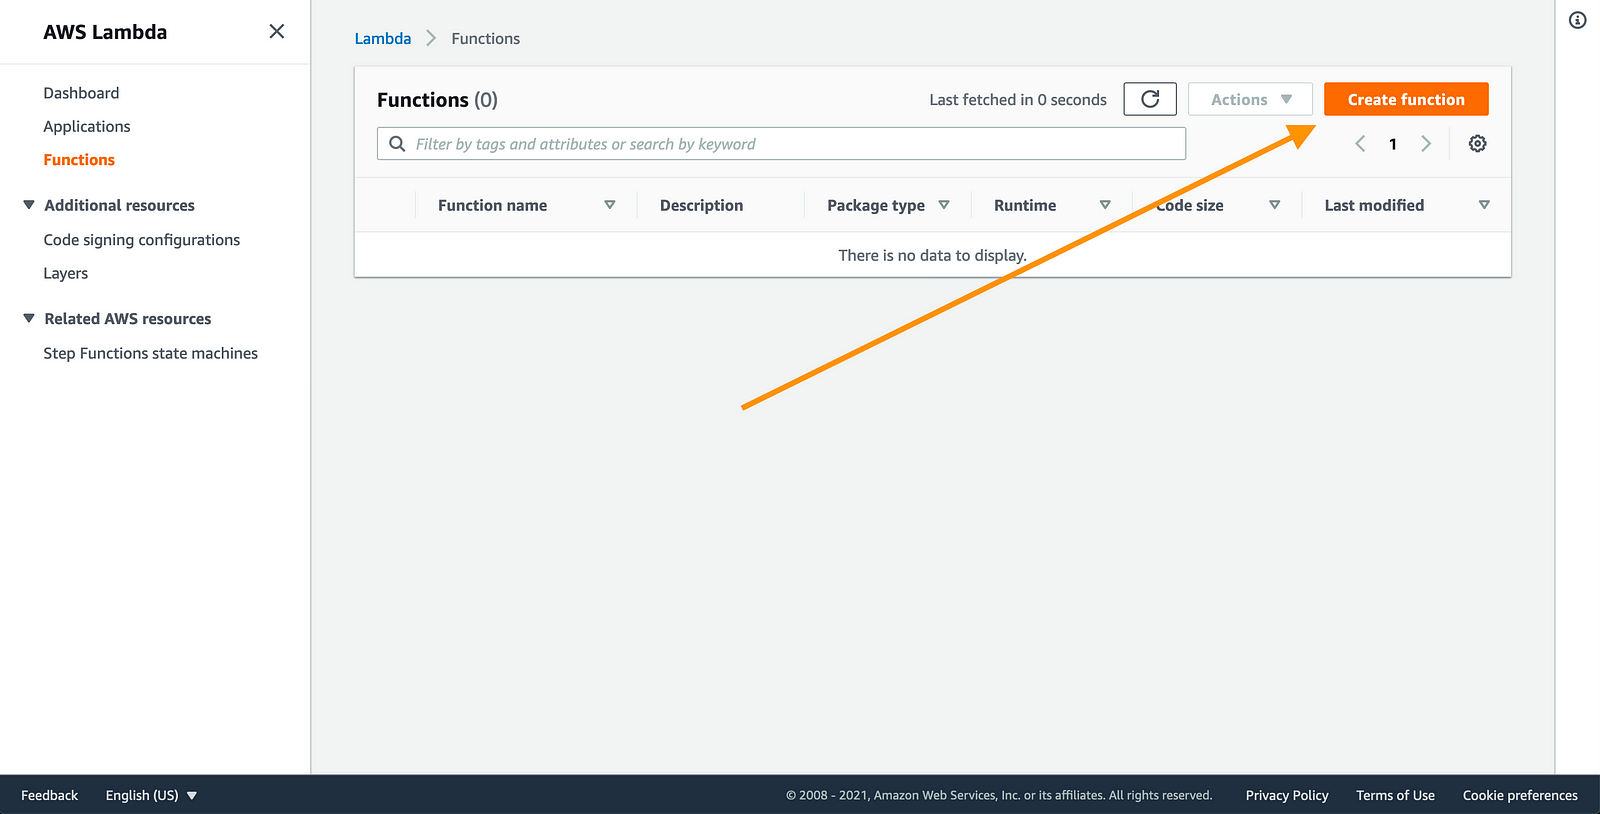
Click ‘Create function’ to create a new Lambda function. In our case, we’ll use a NodeJS template, but you can with any of you’re liking. We won’t develop anything at this point but make sure that it logs something to check that it works.
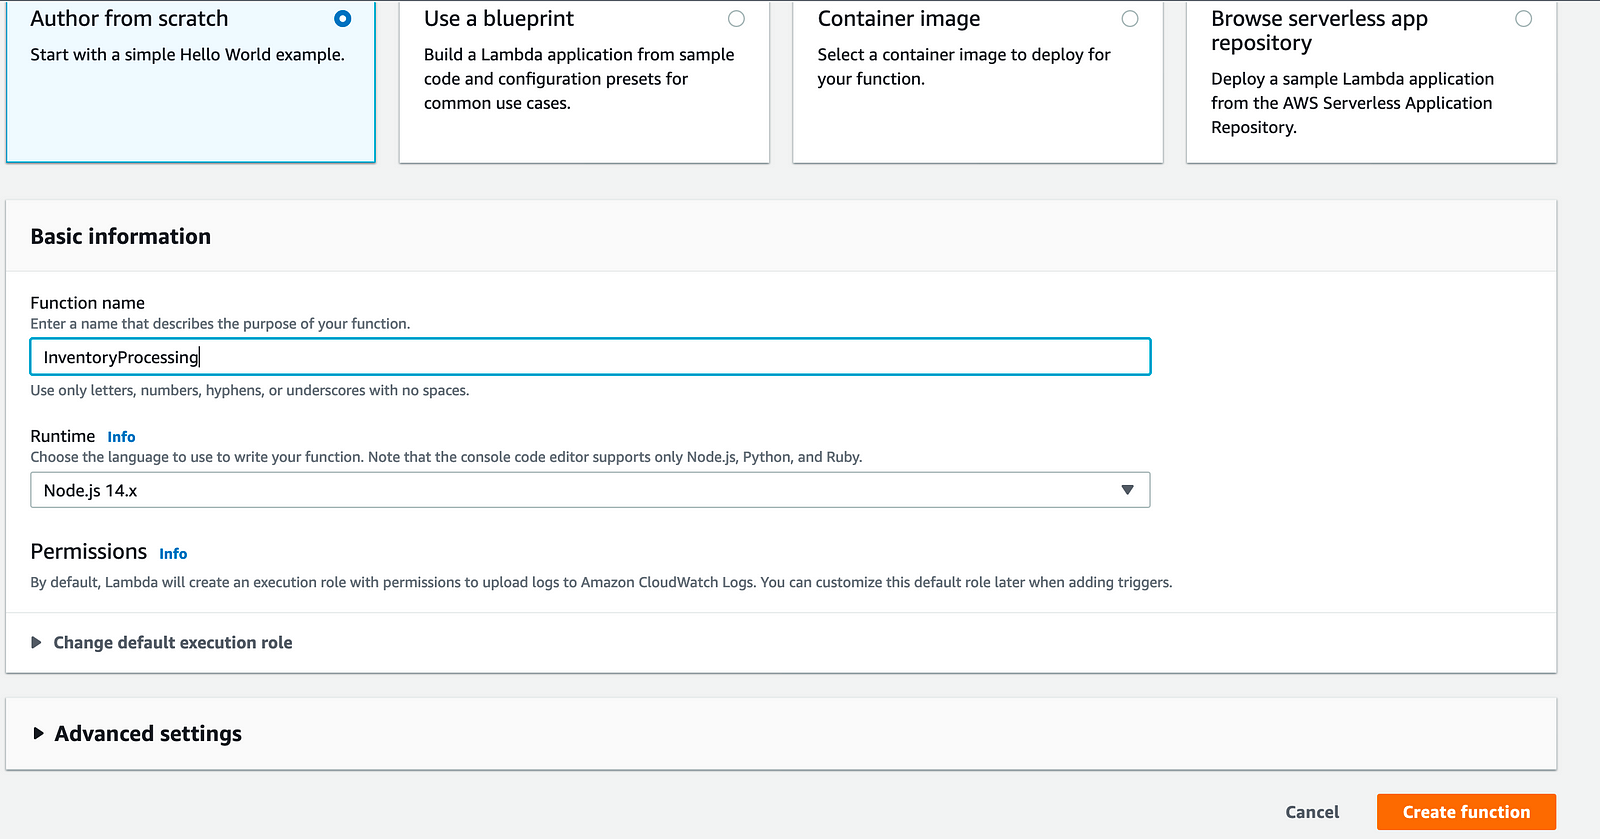
Setting up Amazon EventBridge
Secondly, open up the Amazon EventBridge service in the AWS console, by clicking here. For setting up Amazon EventBridge, we will need to create 2 resources:
- Create the Event Bus to which we will send events
- Create the rule that forwards events from said Event Bus toward our newly created target Lambda
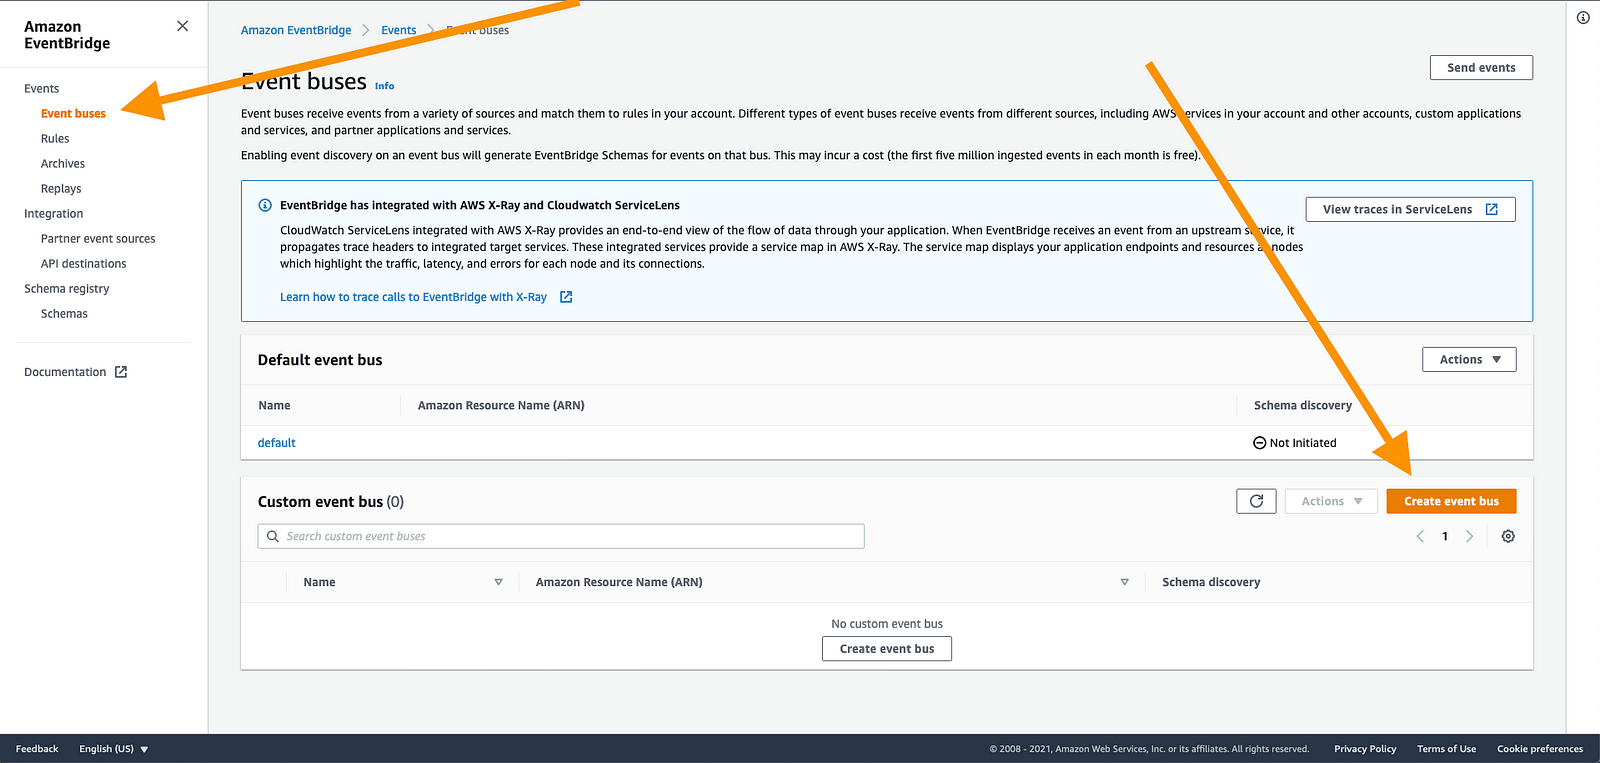
In order to create the Event Bus, navigate towards the Event Buses menu using the AWS Console and click Create event bus
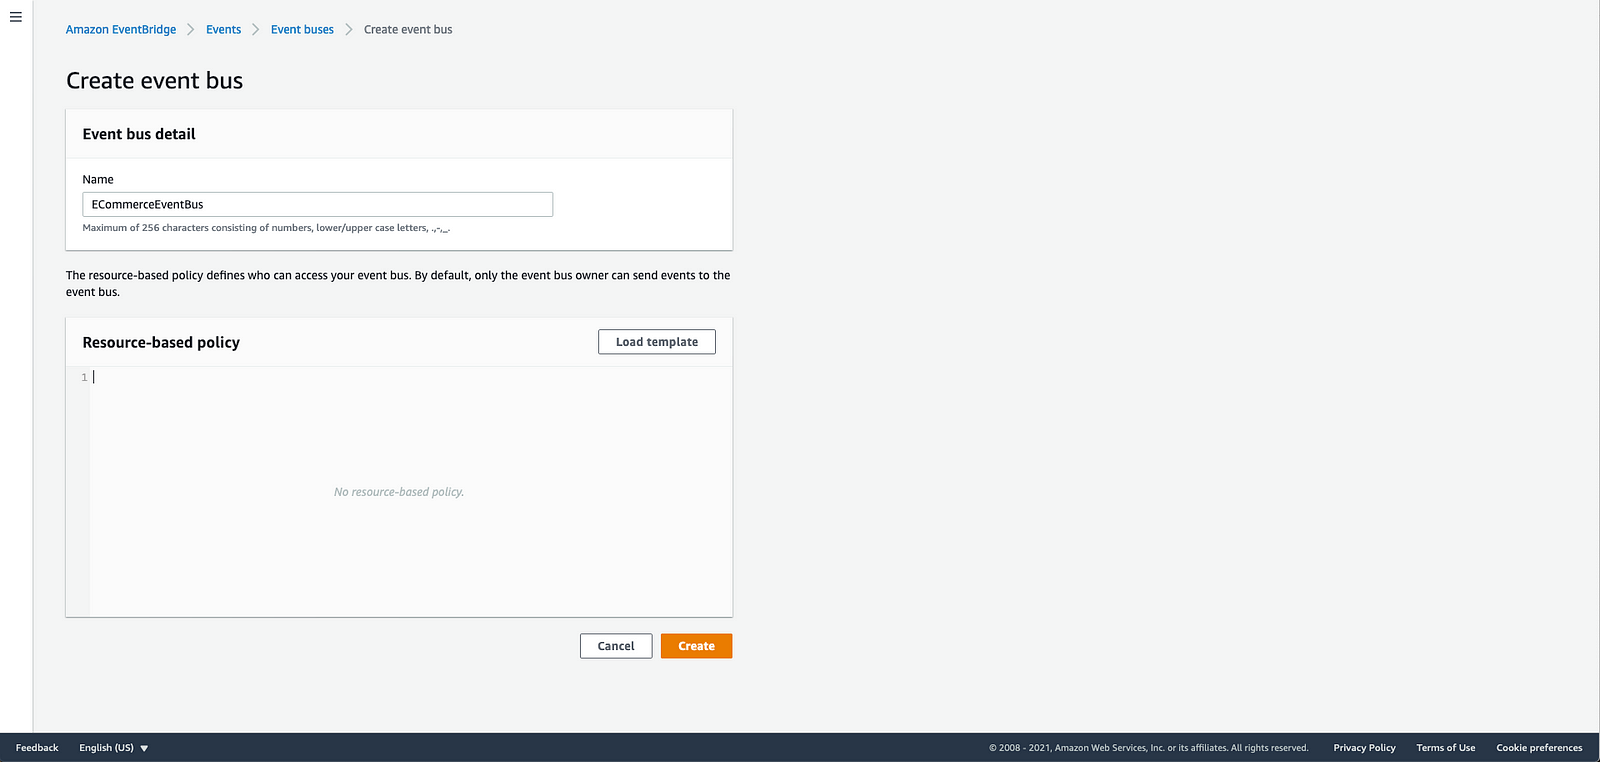
Once there, give the event bus a name of you’r liking and if you wish restrict access using the resource-based policy. We won’t for now and will name it ECommerceEventBus and move on.
With the Event Bus created, we will need to create a rule to forward any events to our AWS Lambda. To do so, navigate using the menu to Rules and click Create rule.
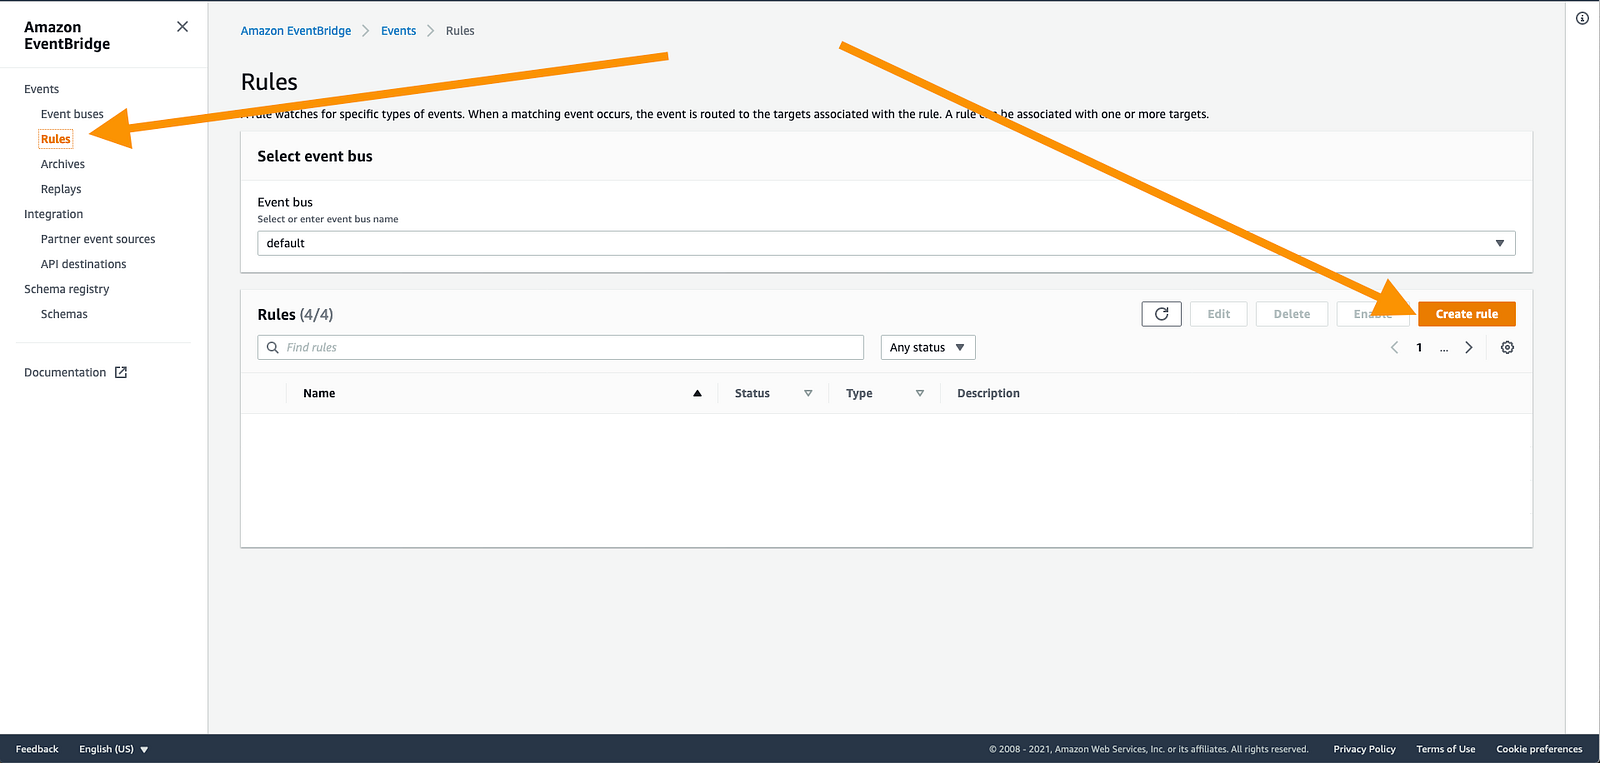
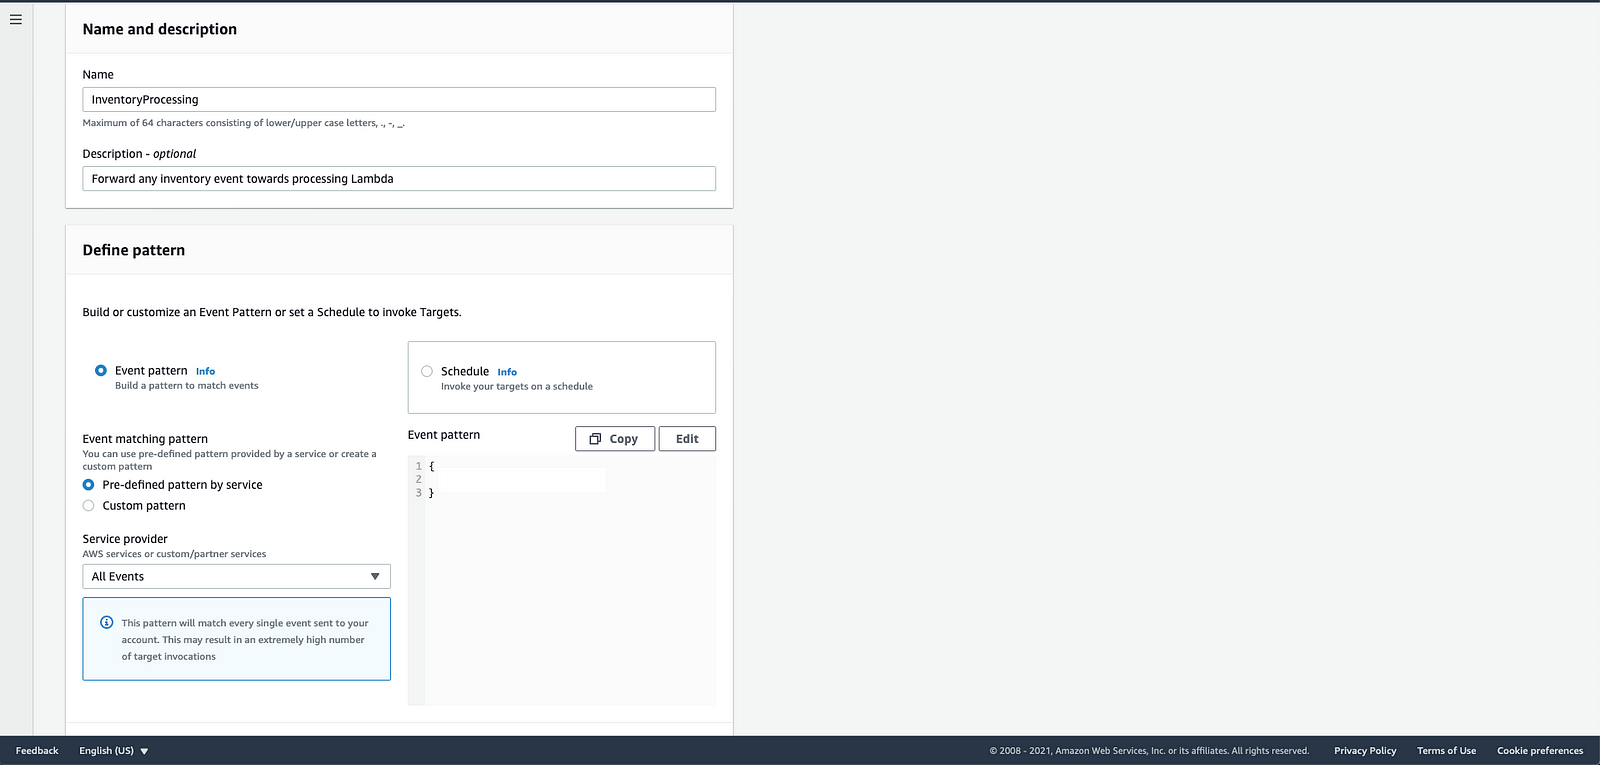
Give the rule a name and specify a pattern to who’m the events must match if you wish to forward them. For the sake of simplicity, we are just going to forward all events towards our Lambda, but this is where you would specify a filter based on event sender, contents, etc.
With that done, all that’s left for the setup is to specify the target of this rule. You can have a number of targets, even including external APIs, but we are specifying are earlier created InventoryProcessing AWS Lambda.
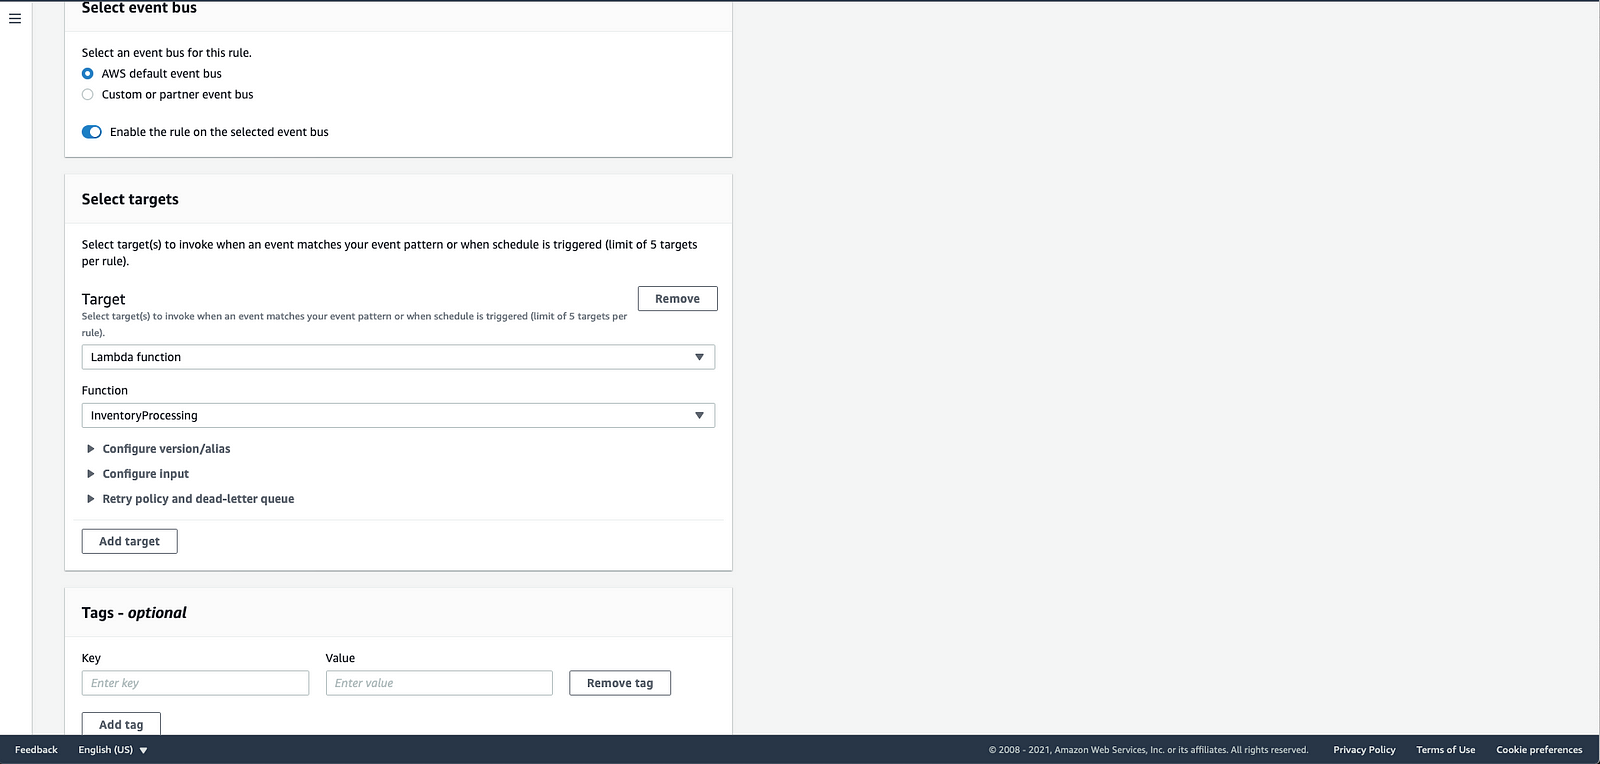
And that’s it, you now have all the moving parts of our architecture created!
Conclusion: What next?
Congratulations making it to this step, you’r stepping into the world of Serverless architecture. If you wish to test the created setup you can go to you’r Event Bus and send out a test event. From there, you should see you’r Lambda being trigger.
If you’re interested in learning more about cloud services and find more hands-on tutorials, check out our blog on https://www.nbtl.blog
On there, you can find:


3 comments